Setting the Stage
So you’re walking out of the pro shop with your brand new V3 or Solution SD, or maybe it was just a new string and tune up on your PSE Carrera. Either way, the first thing you are going to want to do is fling some arrows. I know this because that’s exactly what I would want to do!
Fast forward to the local archery club, or a GenDel in the backyard. You position yourself 30 yards in front of the target. There’s the familiar “tink” as you pop the knock of your Carbon Express onto the string. You muscle through the draw cycle until the cams roll over, and you settle into the back wall. You take a breath as you find your sight picture and align your 30 yard pin with the 12 ring. Finally, you squeeze off the shot. Initially, you’re amazed at the silence yet quickness of this compound machine, until you see the fletchings of your arrow protruding from the target nearly five inches to the right of where you anchored your pin. Immediately you think, “Well that’s odd. I just had this tuned.” You decide to send another arrow down range and this one did not land as far to the right as the first, but it’s about three inches lower. To this I would say leave the allen wrench in your pocket and keep shooting. See if a pattern develops. You shoot through an entire quiver and you’re slightly concerned with the inconsistency of your grouping. After a 60 yard round trip you release another quiver full of arrows with the same result, your grouping is the size of a watermelon. Again, I emphasize leaving the allen wrench alone. I made this mistake a few times in my early years of shooting a compound bow, only to undo my adjustments after discovering the true root of my inaccuracy… BAD MECHANICS!
Let me start this by saying these are no end-all-be-all solutions to accuracy or consistency issues. We should all know by now the technicality of shooting a bow, and this is just from my knowledge of the compound side of things. I won’t even begin to talk about shooting traditional as I have never been good at it. However, some of these techniques may hopefully be useful to traditionalists too. My goal in writing this is to cover shooting habits that can help develop consistency. But it is also important to know how your equipment can affect accuracy.
Non-Human Factors
To keep this part short, every bow has a specific measurement called brace height, which plays a large role in accuracy. Brace height is the distance between the deepest point of the grip to the bow string. The longer your brace height, the more forgiving(accurate) your bow can be. Unfortunately, more often than not, you will have to sacrifice speed for accuracy and vice versa.
It should also be no surprise the importance your arrows have on your ability to hold tight groupings.
- Arrow Weight
- Length
- Spine
- Fletchings
- Broadhead
These all play some sort of role that need to be taken into consideration. The arrow rest used is also a factor though not so much as long as it is tuned correctly. With all of this said, the shooting mechanics I will be talking about are all assuming your bow has been properly set up and tuned to you specifically. Any bow shop should be willing and helpful enough to accomplish this with you whether you purchased the bow from them or not.
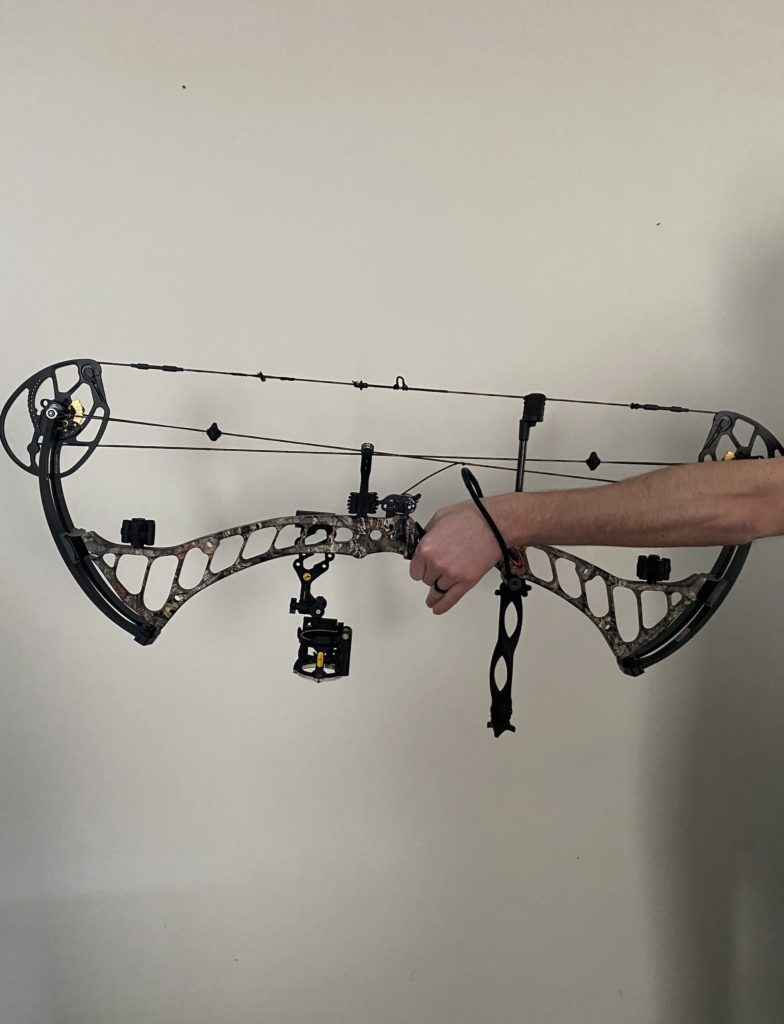
Habit #1: Grip
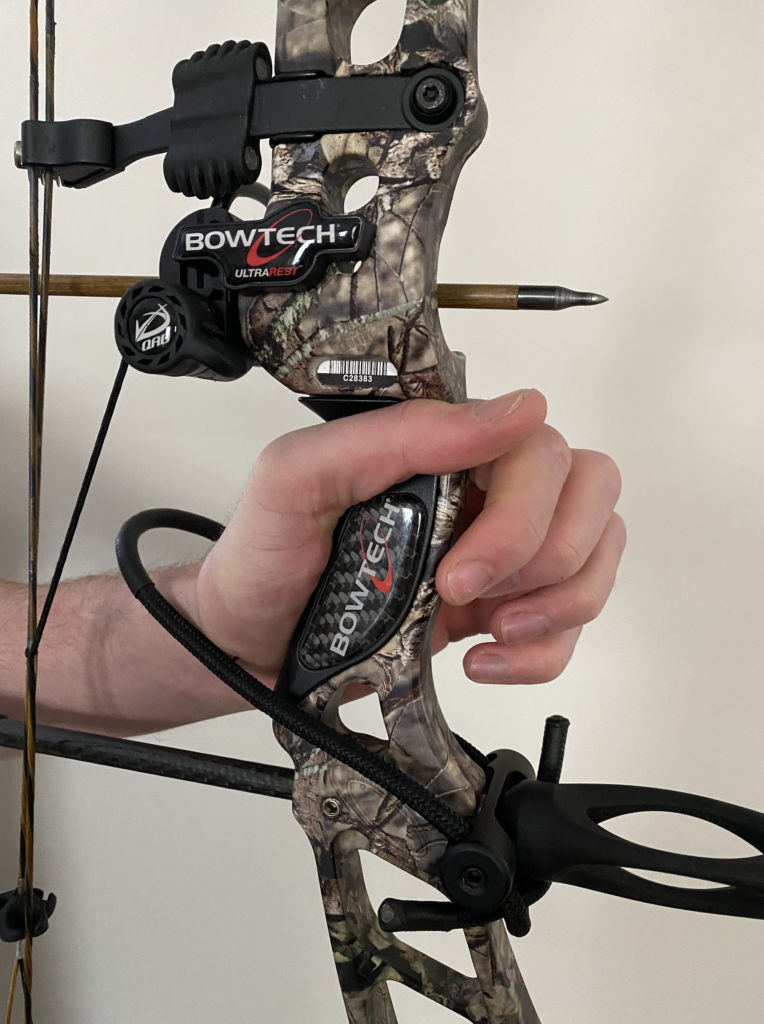
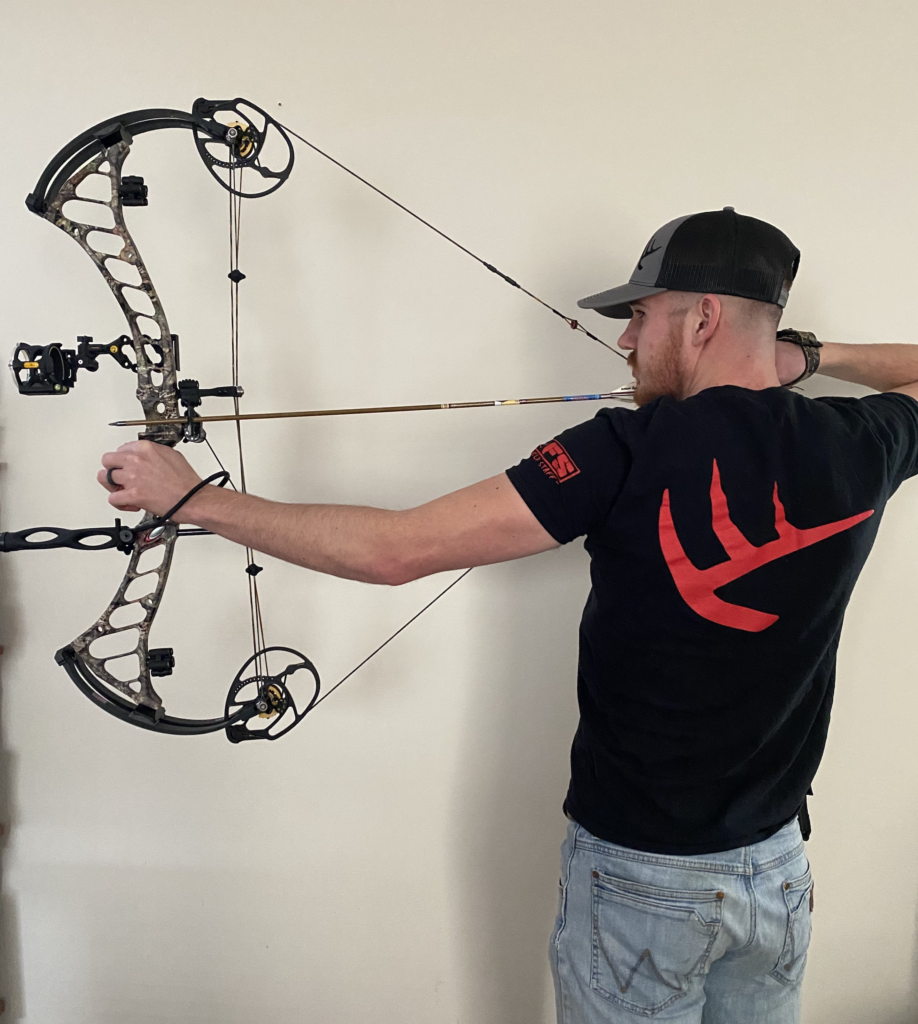
 Now for the meat and potatoes. What do we want the most when shooting a bow? For me it is tight, consistent grouping, from 20 yards all the way to 60, or 80, or however far I wish to shoot. If you develop good habits, they will stick with you no matter how far you are shooting from. This is going to begin with how you grip your bow. But why would the way we grip a bow change the trajectory of an arrow? Well, when I put my arm out like I am holding a bow and make a tight fist my wrist naturally rolls back, pushing the heel of my palm forward. Though while at full draw the tension of the bowstring would stabilize my wrist, once I release, anatomy would take over resulting in a sudden application of torque from my wrist to the riser. While ever so slight, this would result in my arrow flying to the left of my aim. An easy way to correct this is to shoot with a relaxed grip, meaning you are actually putting no pressure on the grip. Some shooters accomplish this by pointing their fingers outward, though I would try to avoid this in case of the unfortunate event that your fingers get in the path of your arrow as it comes off the rest. I position the bow in the webspace of my hand, and just lightly touch my thumb and index finger together. This way the bow is merely resting atop my thumb and index finger.
Habit #2: Anchoring
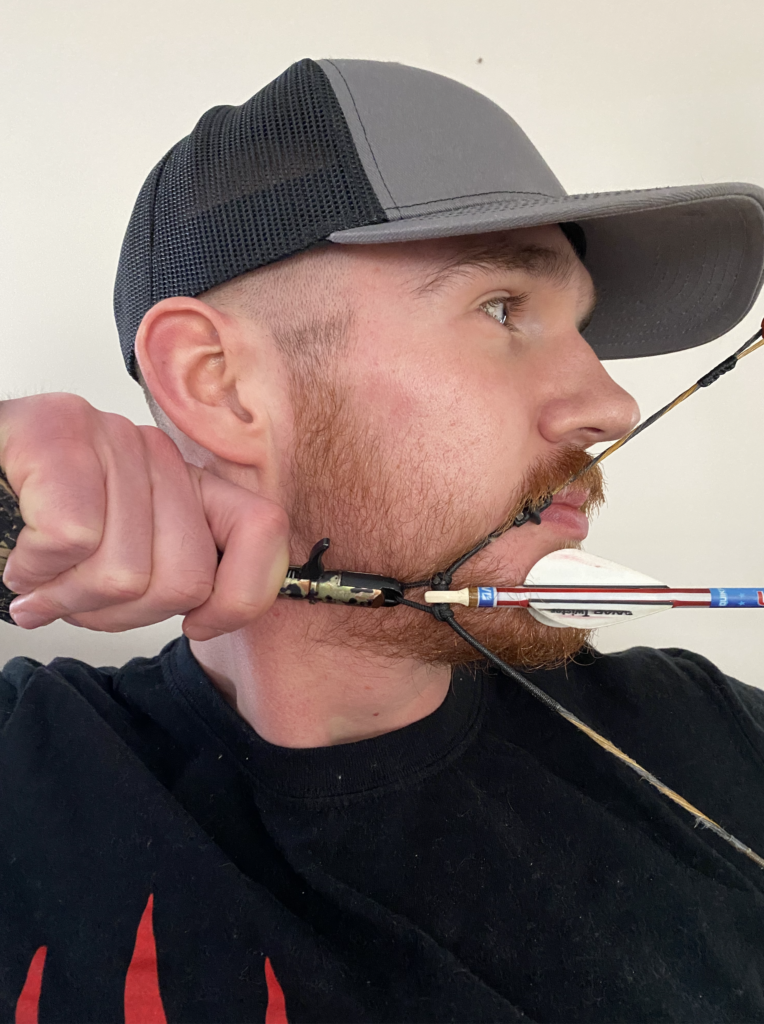
Along with grip, an enormous factor in consistency is your anchoring point. It is very difficult to shoot accurately, consistently, if you are anchoring in different places with every shot. By anchoring, I mean the point where you hold your bow steady. The method I use to sure up my anchoring point is a small addition to my bow string called a kisser button. It’s called a kisser button because when properly installed, the small piece of rubber or plastic will meet with the corner of your mouth at full draw ensuring you anchor in the same spot with each shot. If improperly installed, a kisser button can move around or even fly right off. Also, any time you add weight and resistance to the string, you sacrifice speed even if it’s only 2 or 3 fps. One way to establish a consistent anchoring point without a kisser button would be to align your release against the same spot on your cheek each time. The way I would achieve this without a kisser button would be to place the knuckle of the pointer finger on my release hand against my head, just behind my ear. It could also be done by anchoring so that the bowstring just touches the end of your nose. In my opinion, a solid anchoring point is one of the most important keys to consistent shooting.
Habit #3: Breathing
Another good habit to develop, and maybe the simplest, is breathing. If you try to hold your breath, your brain will start to call out for oxygen. This will cause you to get shaky and lose focus. If you try to force a shot while shaking you will ultimately punch the trigger as soon as you think your sight is over the target. You could miss, or even worse, wound an animal. For those that shoot rifles, or have at least watched American Sniper, know a key to accurate shooting is to squeeze (do not punch) the trigger at the end of an exhale during the pause between breaths. The same concept should be taken into consideration when shooting a bow. I have developed a specific pattern of breathing to help me. I inhale shortly before the draw, hold that breath through the draw cycle, then exhale as I settle into the back wall. Once settled in, I will take another breath as I anchor and align my sight. Finally, I exhale and squeeze off the shot at the end of that breath. Focusing on breathing can also help steady the nerves we all associate with buck fever.
Habit #4: Follow-Through
The final habit I recommend adding to your mechanics, and may be seen as the most unnecessary, is a consistent follow-through. My purpose for developing this is to mitigate the natural urge to immediately drop the bow to see the shot. It is a subconscious movement, and your body is so prepared for it that it will start reacting as soon as, if not before, you release. It may sound irrelevant, but I know an experienced bowhunter from my home state that missed the biggest buck of his life this season because he pulled his bow away too quickly after the shot, causing his arrow to fly low of his aim and slide right under the belly of a 160 class deer. The question is, how do you prevent a subconscious movement? Answer, you don’t prevent it, you just change the movement. This may be the most difficult of the shooting mechanics I’ve talked about, but allow me to explain.You have to train your body to perform a different movement than it’s used to. What I have trained myself to do after a shot is to let my bow fall away from me. For an example of this, check out the video on the Cervicide YouTube channel,
“North Dakota Public Land Whitetail Spot and Stalk.” This is the video of my 2020 bow hunt. At 4:50 you’ll notice I hold on target after the shot for almost two seconds, then allow the bow to fall away from me. The purpose for holding on target is to prevent that jerking movement that may pull my shot. I continue to hold until my bow naturally falls forward. My follow-through has been developed over years of practice. Like I said you are actually retraining your body/mind, so it takes a little bit for it to become natural. The first few times you practice it, you will literally have to force the follow-through. But like anything, the more you practice, the easier it will become until you are following-through after every single shot.
Putting it all Together
The final point I will touch on is not a habit to develop but a note to consider. Some of you may already have a few, but not all of these mechanics. Some of you may just be starting out and have no mechanics at all. My tip to you is to practice these mechanics one at a time. If you try to develop them all at the same time, you will become very frustrated when you are shooting all over the target and don’t know which mechanic you aren’t doing properly. I recommend establishing your anchor point first as lack of this is, in my opinion, the number one cause for inconsistent shooting. Once you are anchoring in the same place every shot, work on your breathing. Release during the pause. After these two habits are developed, fine tune your grip. Loosen your grip and get rid of that unwanted torque. Finally, you can bring all of this together with a solid follow-through to seal the deal. Now, this is not going to happen in one session. You have to practice. And by practice I don’t mean 5 or 10 shots the evening before opening day. I am also not saying you have to shoot 100 arrows a day. Everyone is different and starts to fatigue at different stages. You should shoot as often as you can, and shoot until you feel fatigued. Once fatigue sets in you will become less accurate resulting in frustration; that frustration will make you even less accurate. Trust me, I know! For me, once I put all of these pieces together I could put an arrow ANYWHERE I wanted it. Not only that, I could do it WHENEVER I wanted to. Once you have solid mechanics, you will have a feel, or an idea, of where an arrow SHOULD go when it is released. If it doesn’t, that’s when you can pull out the allen wrench and make adjustments. The key to consistency is having the exact same mechanics with every shot. These are the human factors I have controlled to make myself a better shooter. I sure hope you can too! Straight arrows and tight groups!
To Follow all of Ryan’s adventures checkout his Youtube Channel